Auto Backup of Cpanel to S3 using WHM in CentOS7
As most computer users know, you should make a form of backup whenever you add or delete crucial data from your computer just in case something happens that could destroy this information. It may be as easy as accidental or severe deletion as failure of the hard disk. It's no different for your server. For these "just in cases" situations, there should always be some form of backup.
It is even more important when this information and your website depends on your livelihood or income. In case of hardware failure or a catastrophic event, it is not only advisable to hold "on-server backup" but also to keep backups from the server. For retaining server backups such as Cloud Backups and Block Storage, we offer several cost efficient solutions. Today, we will explain how to set up your server to move your WHM backups to the S3 service of Amazon for your external backup plan.
What is Amazon S3?
Amazon S3 stands for Quick Storage Service, which is Amazon's cloud platform for easy file storage. With this service WHM will synchronize to store your backups on a completely separate network. Some basic Amazon S3 terminology:
Buckets
Buckets are essentially containers for the objects you have stored in Amazon S3. Every object is a file contained in a bucket. For example, if the object named hashtag.jpg is stored in the “royex” bucket, then it is addressable using the URL http://royex.s3.amazonaws.com/hashtag.jpg
Buckets are used for multiple reasons with several purposes: they organize the Amazon S3 content, they identify the account responsible for the stored data and they also are a part of access control used for the data.
You can configure buckets so that they are created in a specific region or location where Amazon stores its data. This allows you to access your data closer to your location. You’ll be able to configure buckets so that every time an object is added to it, a unique version ID is also assigned.
Objects
Objects are essentially files that are stored in Amazon S3. Objects consist of the core object data and also it’s metadata. The data portion is unseen by Amazon S3. The metadata is a set of information that describes the data contained in the data portion. This includes information that describes the object such as the date last modified, and standard HTTP metadata like descriptions of the Content-Type. You can edit custom information for metadata when you store the object as well. An object is uniquely identified within it’s bucket by the key name and the version ID.
Keys
A key is the unique identifier for an entity within a container, as its name suggests. Only think of it as a bar-code. Every object in your bucket has one key in it. Because the combination of a bucket, key, and version ID (if used) uniquely identifies an object, the bucket + key + version in the URL allows you to access this information within your browser. Every object in Amazon S3 can be addressed uniquely by combining the bucket name, the AWS domain, key, and, optionally, a version.
Prerequisites for Storing Files at S3
To store data within Amazon’s S3 service, you will need an account. You can create one here. Amazon also recommends creating an alternate user on your server for accessing their service rather than using the root or default user. Once you have an account, you will need to create and name your bucket. You can use Amazon's guide to create buckets here if you are unsure how. This, however, is fairly simple. After logging in you need to go to Services in the upper left of the title bar and click on S3 within the storage section. Here you will find your buckets if they exist and also a large blue button to create a new bucket.
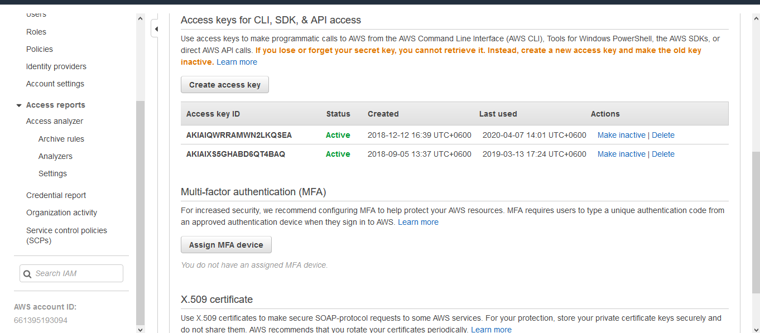
For example our bucket name is royex and folder name is websites. First we need to create a secret access key by clicking the “create access key”. For getting below the window, you need to go to the below url of your aws account: https://console.aws.amazon.com/iam/home?#/security_credentials
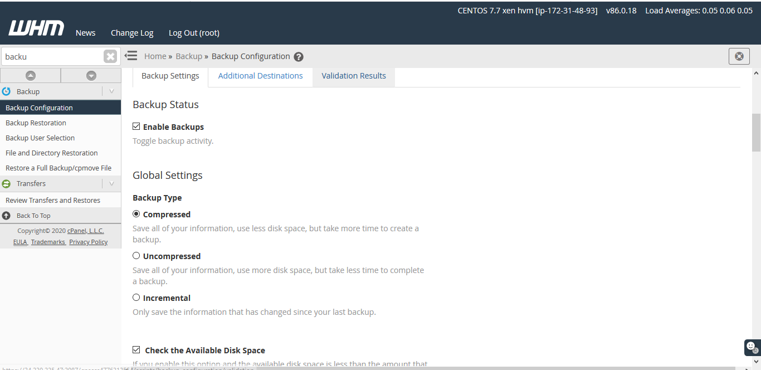
After that you need to go to the backup configuration wizard of WHM. You will find backup configuration
Home >>Backup>>Backup configuration
After that check “Enable Backup” and “compressed”. Others need to keep as defaults.
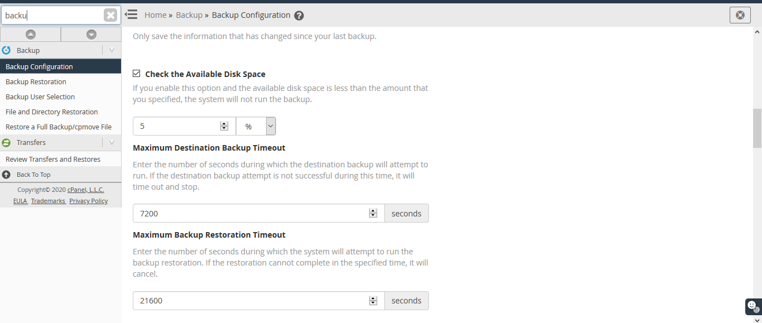
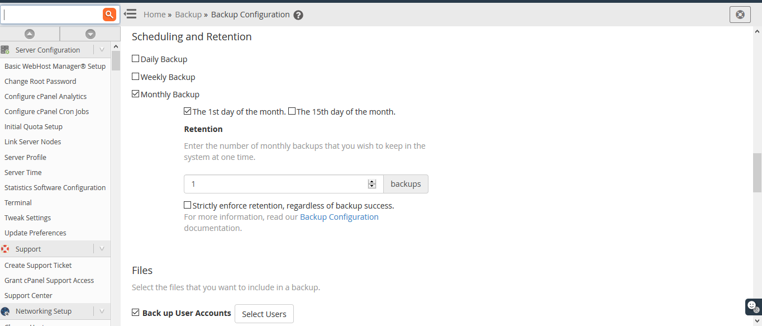
Then you can schedule a retention backup from here. You can configure daily backup, weekly backup and Monthly backup. Then need to select the option which files need to take backup. We want full cpanel backup. That’s why we select “Backup user accounts”.
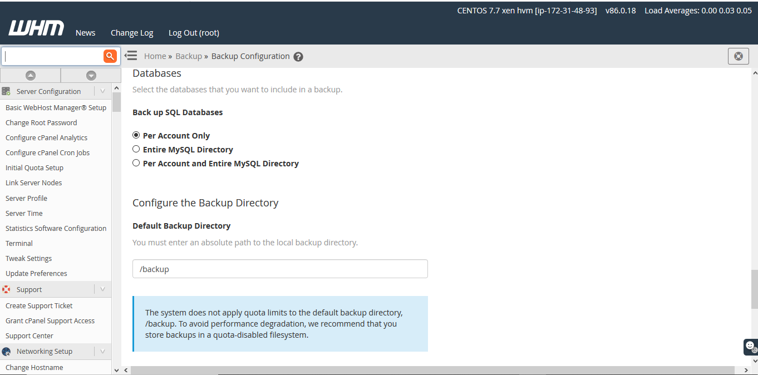
Then we need to Backup SQL Databases. We want “Per Account Only”. So we select that. After that we uncheck the option “Retain Backups in the default backup directory”. If you disable this option,Retain backups in the default local backup directory, even after the system transfers the backups to another destination.If you disable it,the system will delete the backups after they move to another destination.
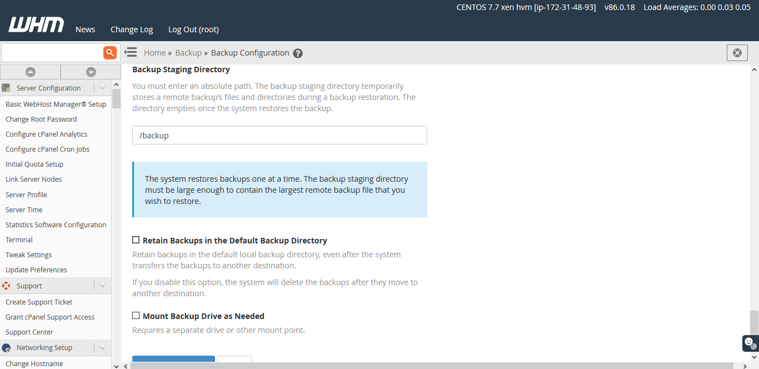
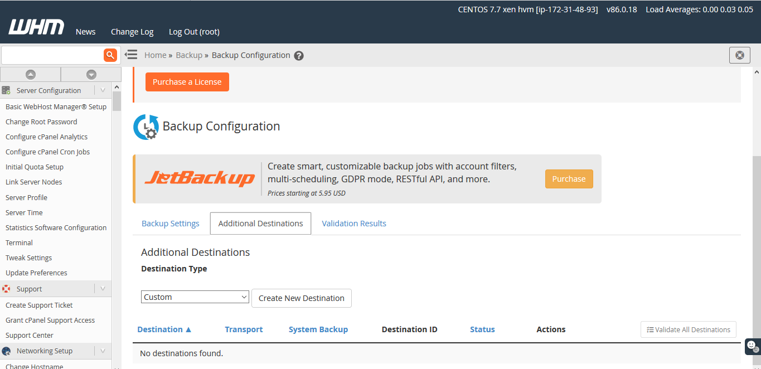
As we need to to store auto-backup at S3 Bucket. We need to connect S3 from the server. Let’s do that. Now click “Additional Destination” and select “Amazon S3” from the dropdown list. Need to provide a destination name. Here I put the destination name backup.
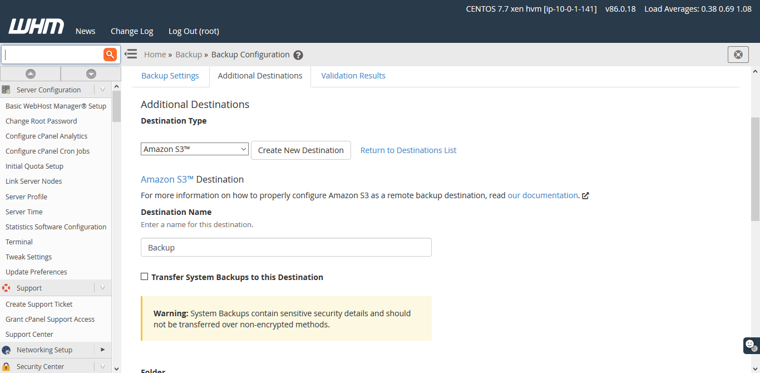
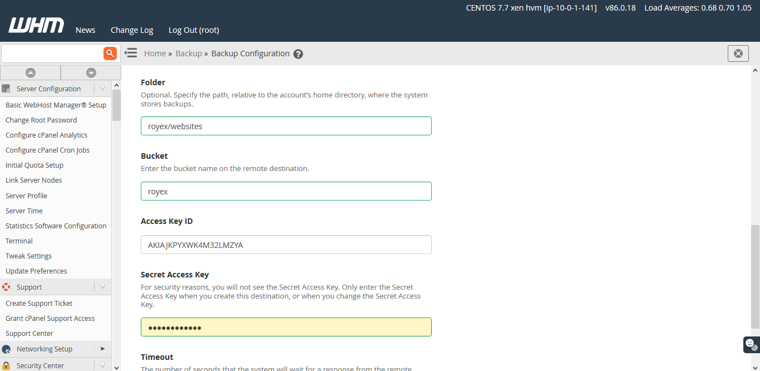
My bucket name “royex” and folder name websites “websites” that I have created already on S3. Now I need to folder under the bucket. Need to specify a full path “royex/websites. Then I need to input the “access key ID” and “Secret access key” that I have generated.
Now we need to click “Save and Validate destination” and after validation click “Save Destination”.
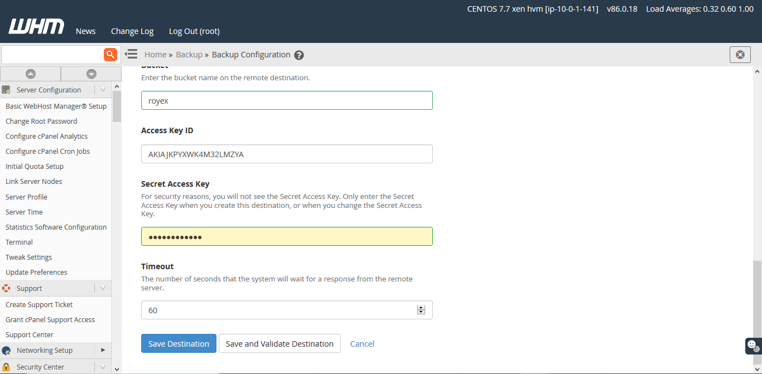
Congratulations ! You have successfully configured auto-backup.
Royex Technologies is one of the leading companies in Dubai for designing cloud servers and maintenance. For all AWS consulting and services, choose Royex. To get started, call for any inquiries at +971566027916 or mail at info@royex.net


